AIFS Sony Tech Challenge
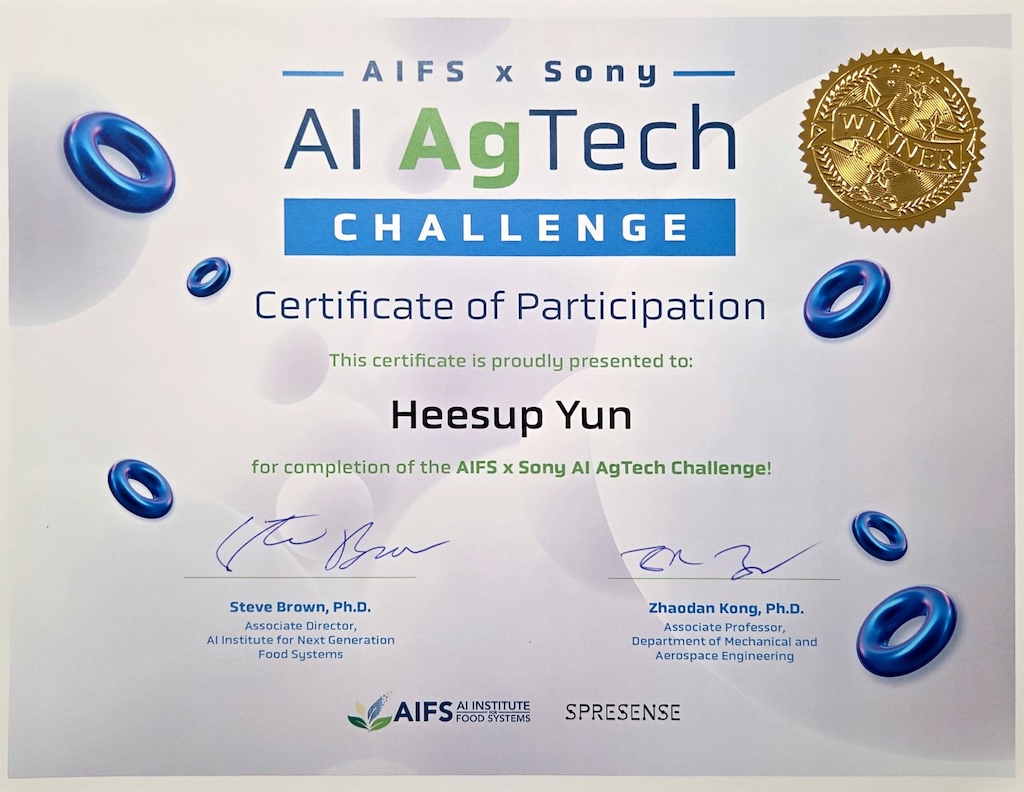
1st Place Winner - 2025 AIFS × Sony AI AgTech Challenge
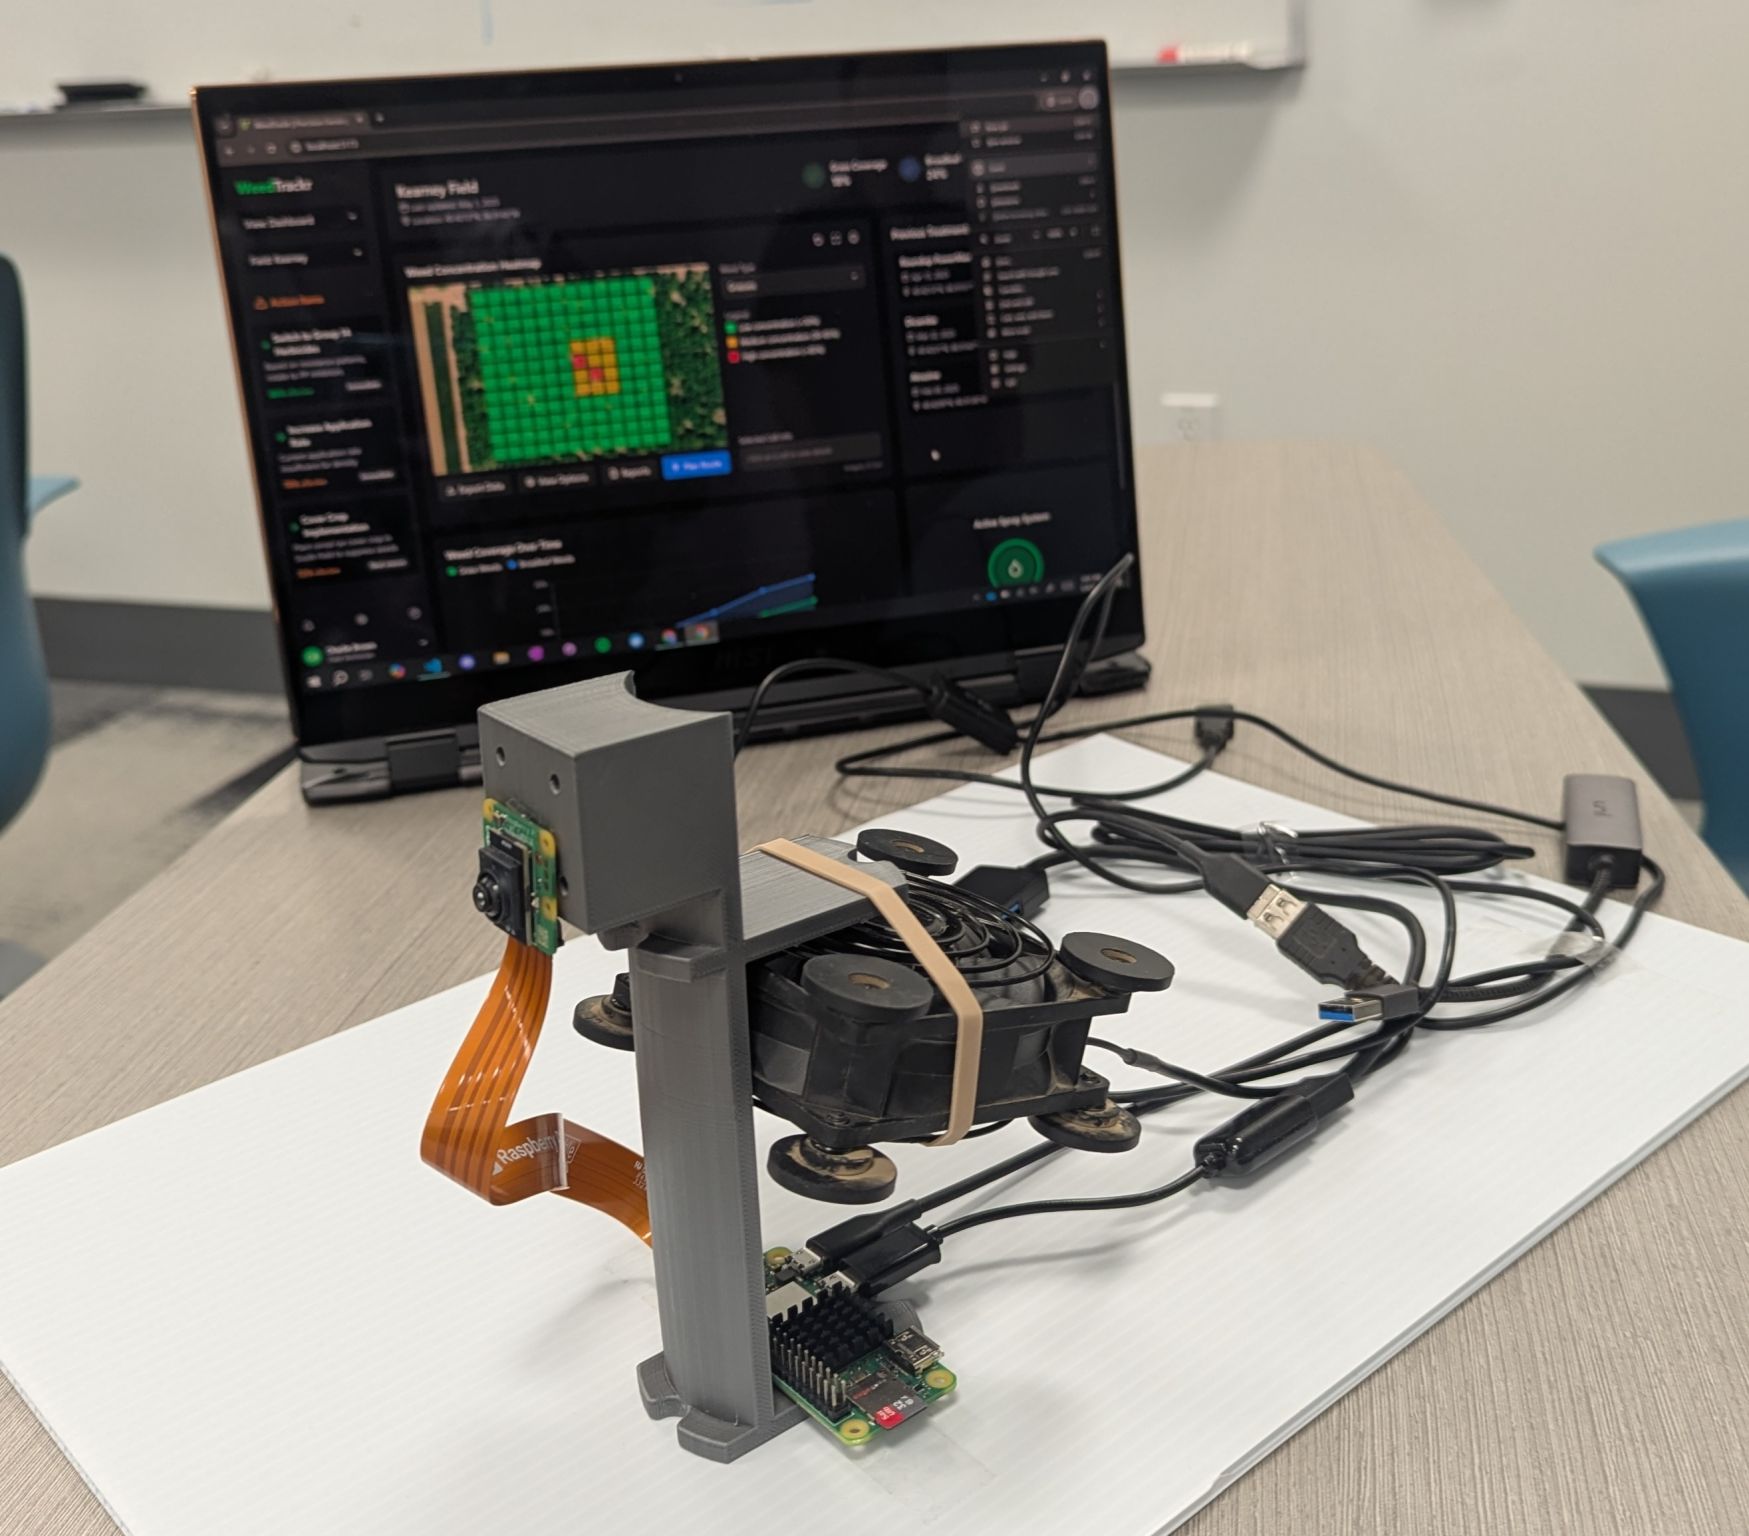
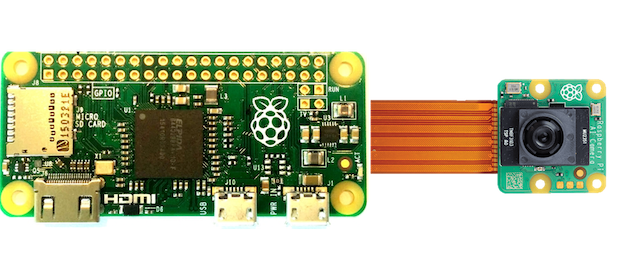
Our team—Heesup Yun, Jonathan Berlingeri, Ethan Truong, and Nathan Chiu—secured the 1st Place win at the 2025 AIFS × Sony AI AgTech Challenge. Successfully delivered a technical demo within a two-day hackathon timeframe. Equipped with a Raspberry Pi Zero and a Raspberry Pi AI Camera, we built WeedTrackr: Precision Weed Management System.
The Problem We’re Solving
Weed management is a critical challenge facing modern agriculture, with profound economic and environmental implications:
- $33 billion in annual U.S. crop yield losses due to weed competition.
- $6 billion in additional control measure costs each year.
- 70 million pounds of herbicides are lost to imprecise application and overuse each year.
Conventional methods rely on “blanket” treatments—equal amounts are applied to the entire field regardless of actual weed distribution. While precision equipment exists, it is expensive and built primarily for annual row crops. In vineyards and orchards, mowing is common for controlling weeds between rows, but weeds along rows remain another challenge.
Our Solution: WeedTrackr
WeedTrackr is a low-cost AI weed monitoring system designed specifically for planning herbicide sprays in orchards and vineyards. It automates weed scouting and herbicide application planning during regular maintenance activities, saving time and money, and mitigating environmental impacts by reducing herbicide use by up to 90% through targeted application.
Simple 3-Step Process:
- Mount: Mount WeedTrackr onto your mower or tractor.
- Power on: Activate the image collection system by powering on WeedTrackr.
- Work: That’s it! Continue with planned activities. WeedTrackr will work autonomously in the background while you do!
Technical Workflow (Detect → Classify → Plan)
WeedTrackr’s software stack integrates affordable, off-the-shelf hardware with custom integration software.
- Detect: We use a Raspberry Pi Zero with the AI-enabled camera and a Sony Spresense GPS module to capture geolocated images as you move through your field.
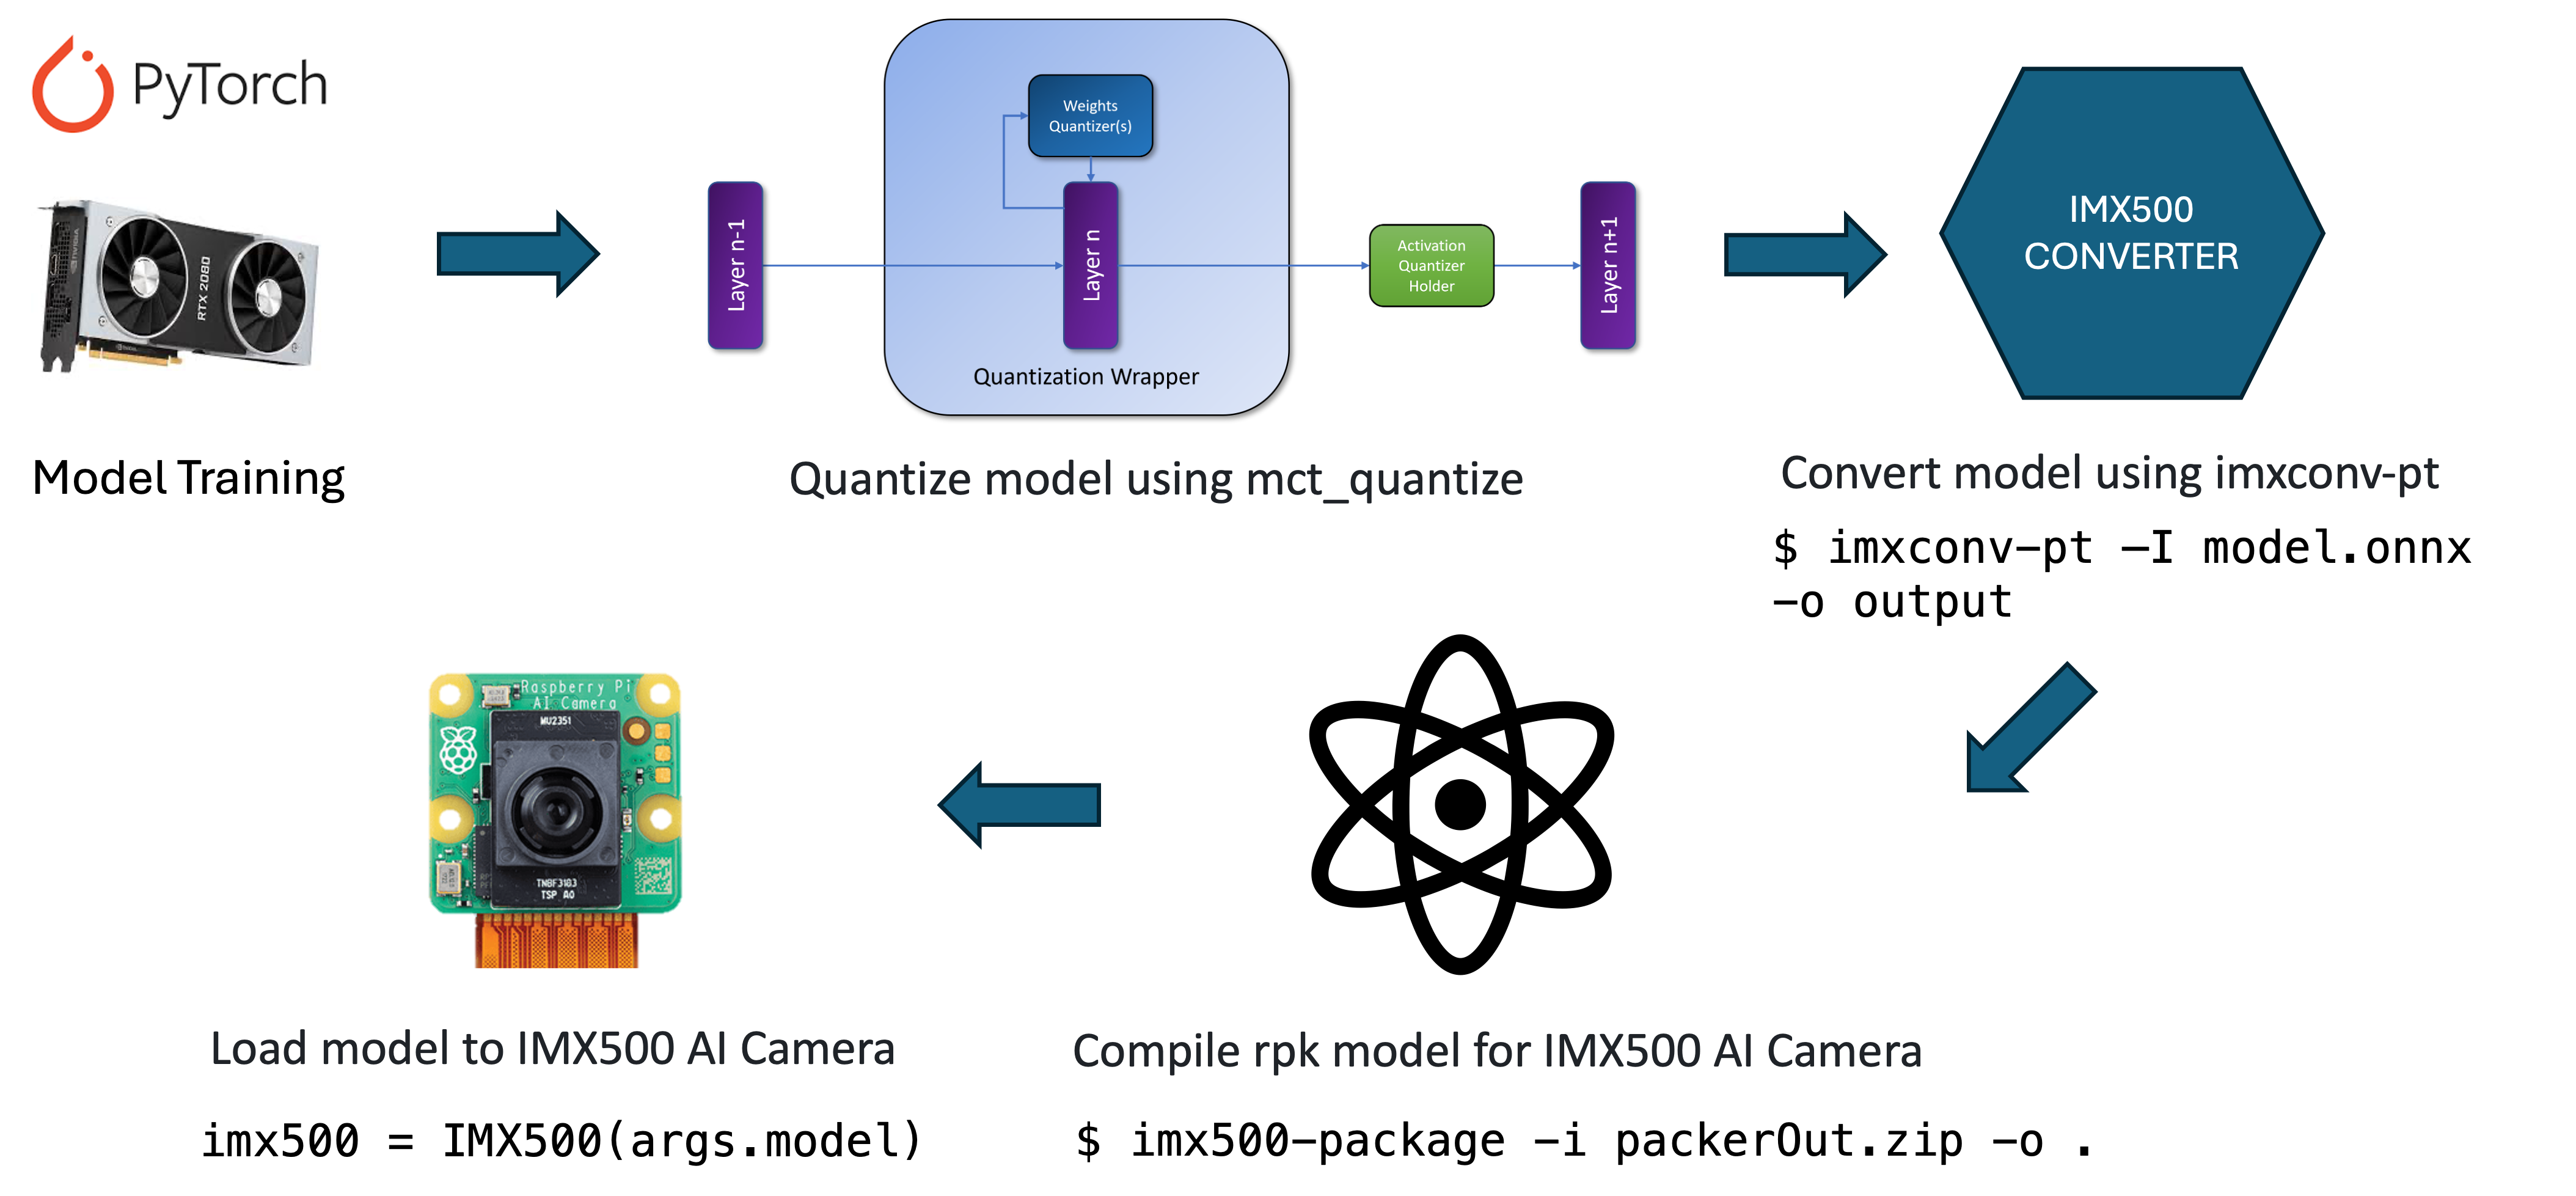
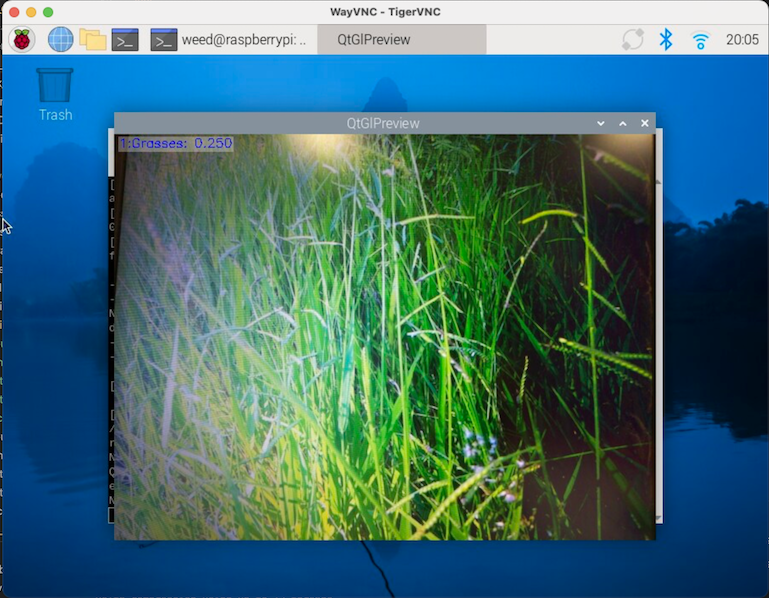
- Classify (Edge AI): The onboard AI model processes images in real-time to identify and categorize weeds (broadleaf vs. grass) and distinguish them from the soil. Our custom weed classification model is built on a modified MobileNetV2 architecture, trained on a diverse dataset (500+ broadleaf, 500+ grass, 1000+ soil/background)
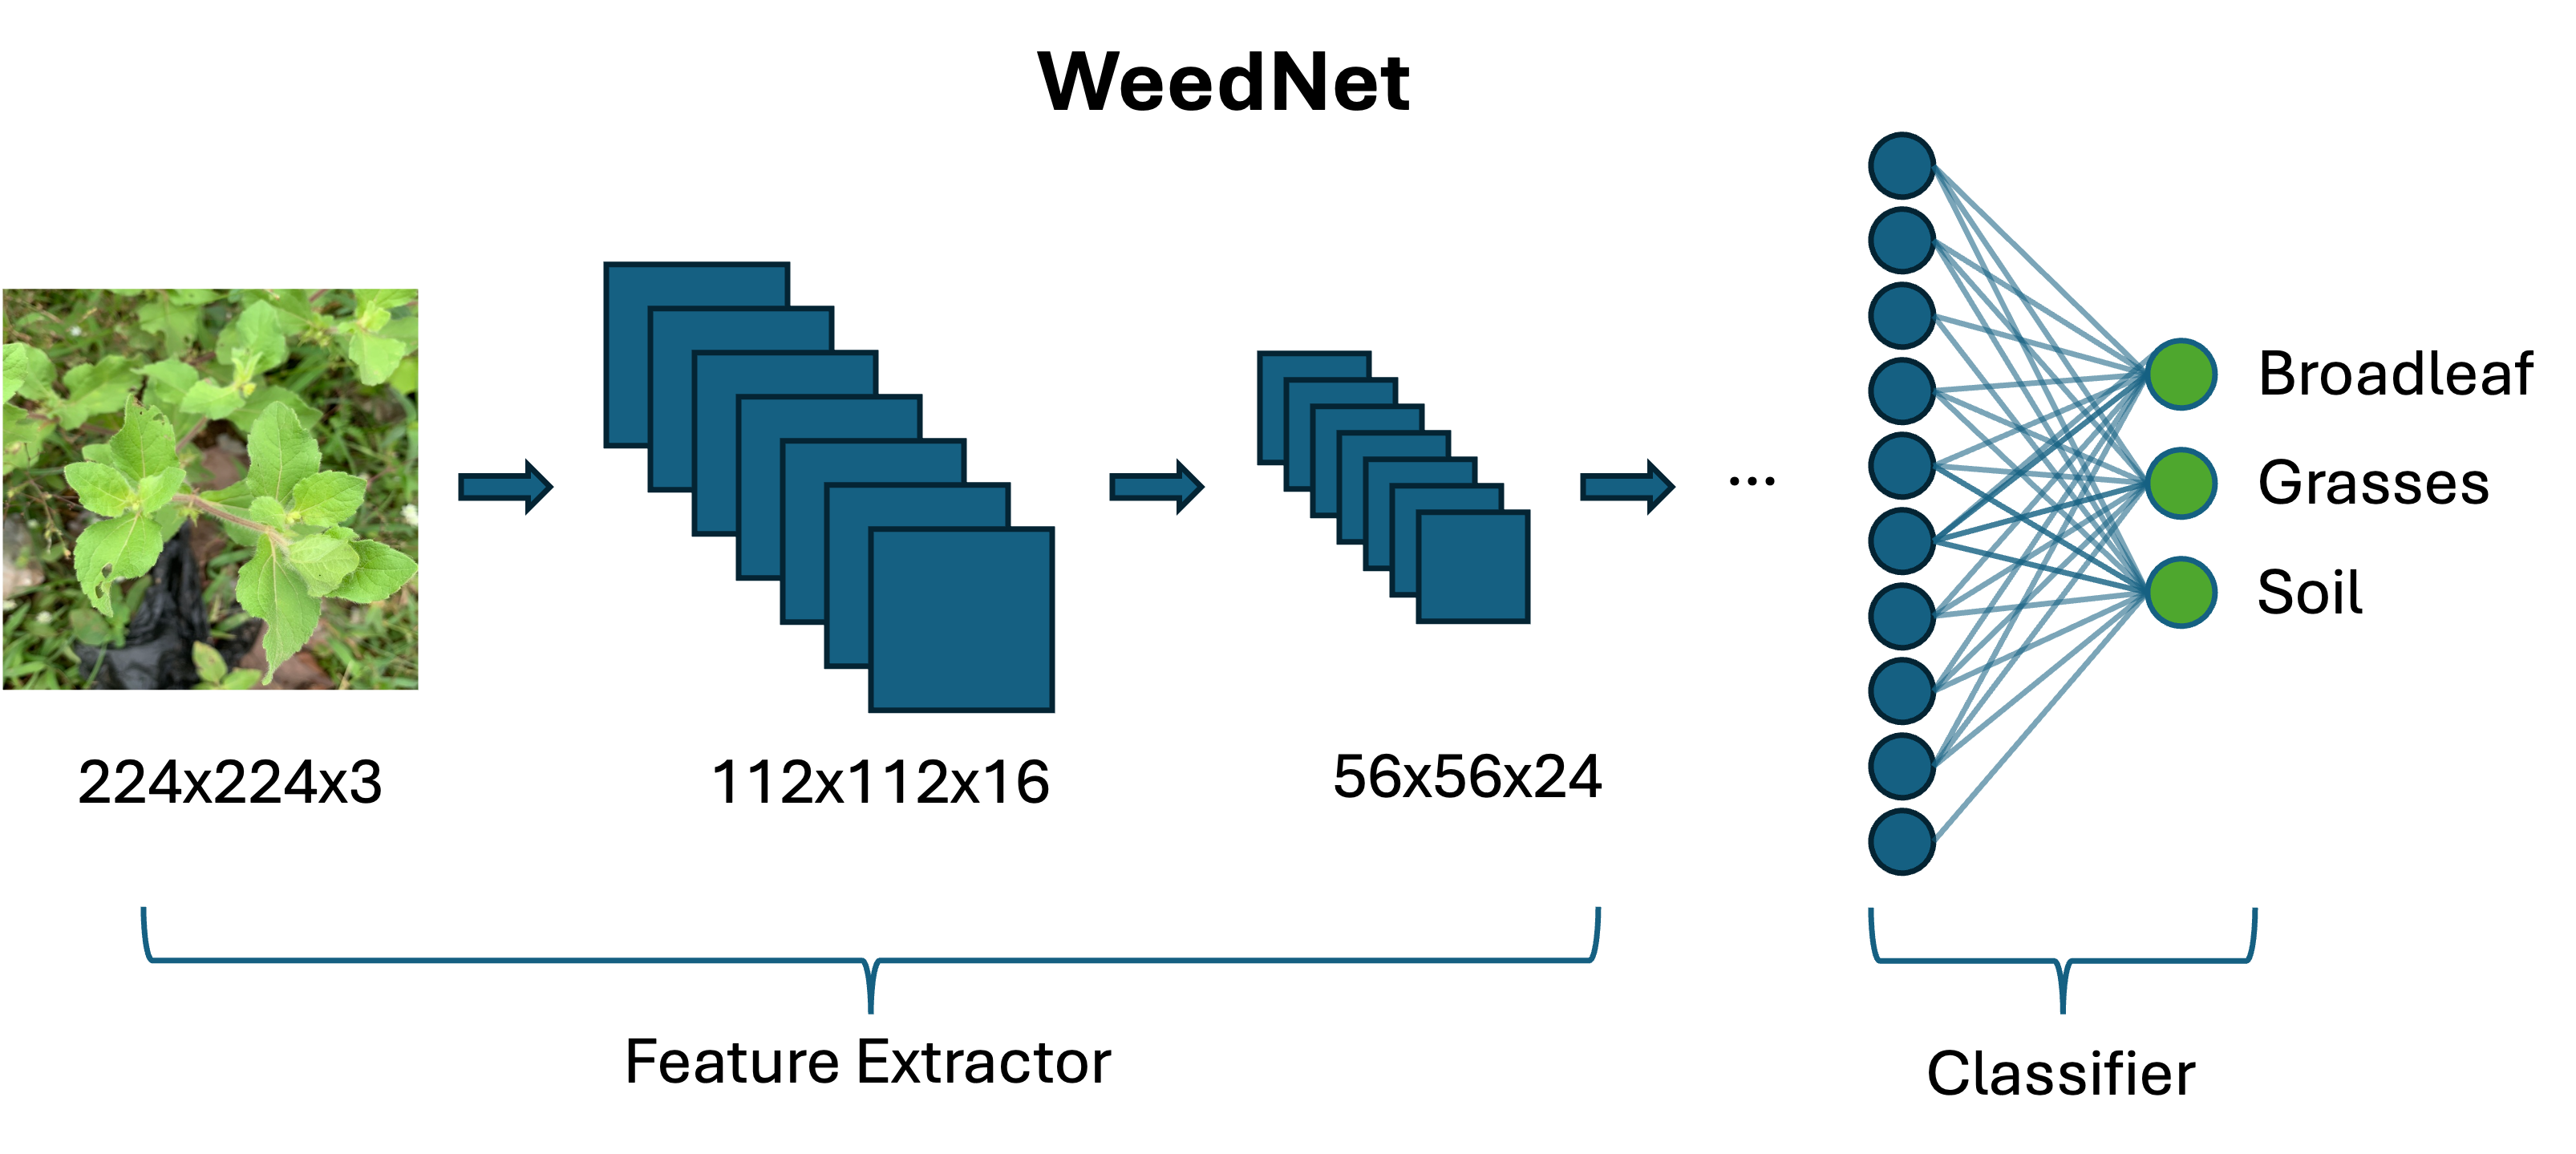
The model was optimized for edge deployment. Using MCT (Model Compression Toolkit) for INT8 quantization and ONNX conversion to an IMX500 package, we reduced the model size by 75% while maintaining over 93% of the original accuracy.
- Plan (Web Dashboard): Built with React + TypeScript, the frontend dashboard uses the classified data to generate intelligent spray route planning and variable rate application maps. It visualizes GPS-accurate weed distribution heat maps (separating grass and broadleaf weeds), historical treatment analysis, and estimated chemical savings compared to blanket treatment.
Why Now & Impact
AI and robotics are finally accessible and scalable. As agricultural input costs (chemicals, labor, and fuel) climb and government regulations tighten, minimizing chemical buildup and preserving long-term biodiversity has never been more imperative.
By only spraying where it’s needed, WeedTrackr helps farmers:
- Stay compliant with evolving environmental standards
- Keep food cleaner by reducing herbicide over-usage
- Protect land health
- Reduce manual labor by automating weed scouting
- Boost crop yields with fewer weeds and better plant performance
Technical Details
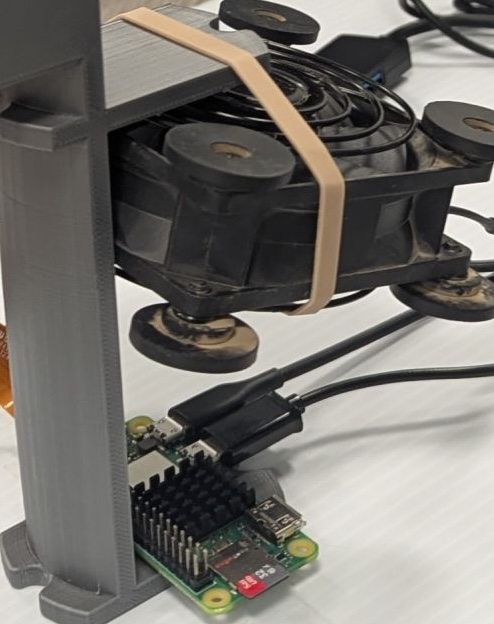
The Raspberry Pi Zero isn’t typically powerful enough to handle deep learning right away. To make it work, I pushed the CPU and GPU limits through overclocking and tailored our image classification model for the Raspberry Pi AI Camera. This setup shifts the heavy lifting from the CPU to the camera’s dedicated AI accelerator, making it possible to run sophisticated models on such a small, low-power device.
We first set up the device with a 64-bit OS referring to this guide: Install 64 OS on Raspberry Pi zero 2 - Q-engineering.
Below is the evolution of our hardware configurations, utilizing resources like the MakeUseOf overclocking guide.
1. Stock Configuration
By default, the arm_freq is set to 1000 and gpu_freq to 300.
weed@raspberrypi:~ $ vcgencmd get_config int
... (shortened)
arm_freq=1000
core_freq=400
gpu_freq=300
sdram_freq=450
2. First Overclock
We increased the arm_freq to 1200 and core_freq to 500 for a noticeable performance bump without touching the voltage.
weed@raspberrypi:~ $ vcgencmd get_config int
... (shortened)
arm_freq=1200
core_freq=500
gpu_freq=300
sdram_freq=450
3. Pushing Further
Finally, we pushed arm_freq to 1300, gpu_freq to 500, and sdram_freq to 500. We also configured over_voltage=5 and over_voltage_sdram=3 to keep the system stable.
weed@raspberrypi:~ $ vcgencmd get_config int
... (shortened)
arm_freq=1300
core_freq=500
gpu_freq=500
sdram_freq=500
over_voltage=5
over_voltage_sdram=3
These settings can be permanently applied in /boot/config.txt as follows:
[all]
arm_freq=1300
core_freq=500
gpu_freq=500
sdram_freq=500
over_voltage_sdram=3
# over_voltage is done by the governor.
# set the parameter to overrule its moderate choice.
over_voltage=5
enable_uart=1
dtoverlay=pi3-miniuart-bt
Overclocking improved the VNC performance a lot. But it requires active cooling, so I added a heatsink and fan.
Running the AI Model on the Raspberry Pi Camera
Getting the deep learning model to run optimally on the Raspberry Pi AI Camera involved several rounds of testing.
1. Exploring TF Lite & Miniforge
We initially explored installing TensorFlow Lite and experimented with a few guides for object detection and image classification, such as building the tflite-runtime explicitly for the Pi Zero:
echo "deb https://packages.cloud.google.com/apt coral-edgetpu-stable main" | sudo tee /etc/apt/sources.list.d/coral-edgetpu.list
curl https://packages.cloud.google.com/apt/doc/apt-key.gpg | sudo apt-key add -
sudo apt-get update
sudo apt-get install python3-tflite-runtime
We also set up a local Conda environment using Miniforge to manage dependencies cleanly. We reviewed the official TensorFlow Lite Raspberry Pi examples. To ensure the camera works, it’s also practical to check out the new libcamera-based Python library, picamera2.
2. Resolving Environment Conflicts
To use the specific Sony IMX500 AI sensor effectively, the necessary tools are installed via:
sudo apt install imx500-all
3. Execution
Once the environment was correctly pointed towards the native Raspberry Pi OS libraries without Conda’s interference, everything ran flawlessly. We successfully executed our .rpk compiled model with:
python imx500_classification_demo_ucd.py --model weeed.rpk --softmax
You can check out our repository and code here.